 The crazy has been in full force for the past week or so, what with deadlines at work. Everyone is under firm instruction to think happy thoughts that everything goes my way, happens as I have planned and otherwise works out well.
 Having more or less caught up on life, I'm still working on getting back into sewing. There have been several aborted attempts to start something (or finish something) but I'm fairly well tapped out just now, so mostly I've been mending. (useful, but not so interesting.) Actually - I lie - there was one interesting part of whole mending experience -- I finally figured out why a particular RTW shirt had always sort of bothered me -- the collar was all wrong. So -- out came my trusty seam ripper, off came the collar, the stand was sewn up, and blamo -- mandarin collar (much more suited to the shirt.)
**************************************************************************************************
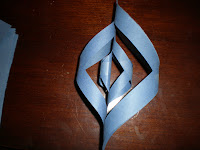
 Now -- Paper stars!!!! I'd taken these pictures months ago intending to do a snowflake tutorial, but they work just as well as stars. I had them in half a dozen colors for my birthday and they invariably knock people's socks off despite being ridiculously easy to throw together.
Supplies: 6 square pieces of paper. Size doesn't really matter, but about 4 inches is nice
tape, scissors, string (to hang them up)
1) fold a square in half to make a triangle. On the right side, make three angled cuts from the fold toward the center - but fall short by about a centimeter or so. Do the same on the left.
2) Lay the paper flat. You should see a sort of diamond pattern -- take the two innermost points and tape them together. Don't fold anything, just let the paper curve.
3) Flip the paper over and do the same thing -- tape the points of the diamond together, but this time curving in the opposite direction.
4)Continue flipping and tapping points together with the next two diamonds.
6) Do all of the above five more times.
7) Tape the center points together (I like to do two groups of three and then attach the sets.) You can also tape the middle of the diamonds where they touch the other sections -- but a smaller star probably won't need the extra support.
8) Tie on some string and hang!


My daughter made those stars at school this past Christmas---she came home and made one for the top of our Christmas tree. :)
ReplyDeleteGood luck with your work busy-ness!
most excellent, and thank you! one of the mystery items has already worked out. :)
Delete