Showing posts with label coats. Show all posts

Monday, February 2, 2015

Winterized!


Just in time for the snow.

My minoru is finished! (about three weeks ago, but I've apparently turned into a giant blob of doom)   As usual, I went a bit rogue.   Most notably, I skipped the elastic in the back - I'd actually put it in, but with the extra puffiness from the thinsulate, it looked weird, so I took it right back out.

Side note: working with the thinsulate was a pain in the butt - if you ever choose to use it, quilt the fuzzy side before you use it.  Otherwise it catches on everything and picks up lint and dust and whatnot..


a few days earlier, ready for the winter blasts.

Other changes include wider sleeves, as I really like being able to bend my arms.  (Mostly a thinsulate thing, but also a pattern thing - I think since I knocked down about 6 sizes to get the ease right the sleeves were made to fit the size person it was actually intended for.)  Also longer sleeves, as I ditched the elastic cuffs, the outside pockets and a three-piece, lined hood.  (The hood changes were purely stylistic.  I thought it looked snazzier with two sets of top stitching, rather than one down the center.)


Despite the size reduction, I still have a full range of motion.  I haven't tried a cartwheel yet, 'cause the ground is cold, but I feel confident I could if I felt the need.


The one major criticism I have is that the hood doesn't cinch down.   My next version (and there will be a next, although not for a little while) will have a cinchable hood.)  It keeps blowing off in the high winds and leaving me with a chilly head.


Monday, January 12, 2015

soon...

still to do: some top stitching, the elastic, hem and cuffs

By the way - midatlantic peoples, you're welcome for chasing away the well-below-freezing temperatures.   The closer I get to finishing the warmer it is.   For the first time ever, I find myself wanting the awful cold to come back, so I can be snug.

Thursday, January 8, 2015

Zipping right along

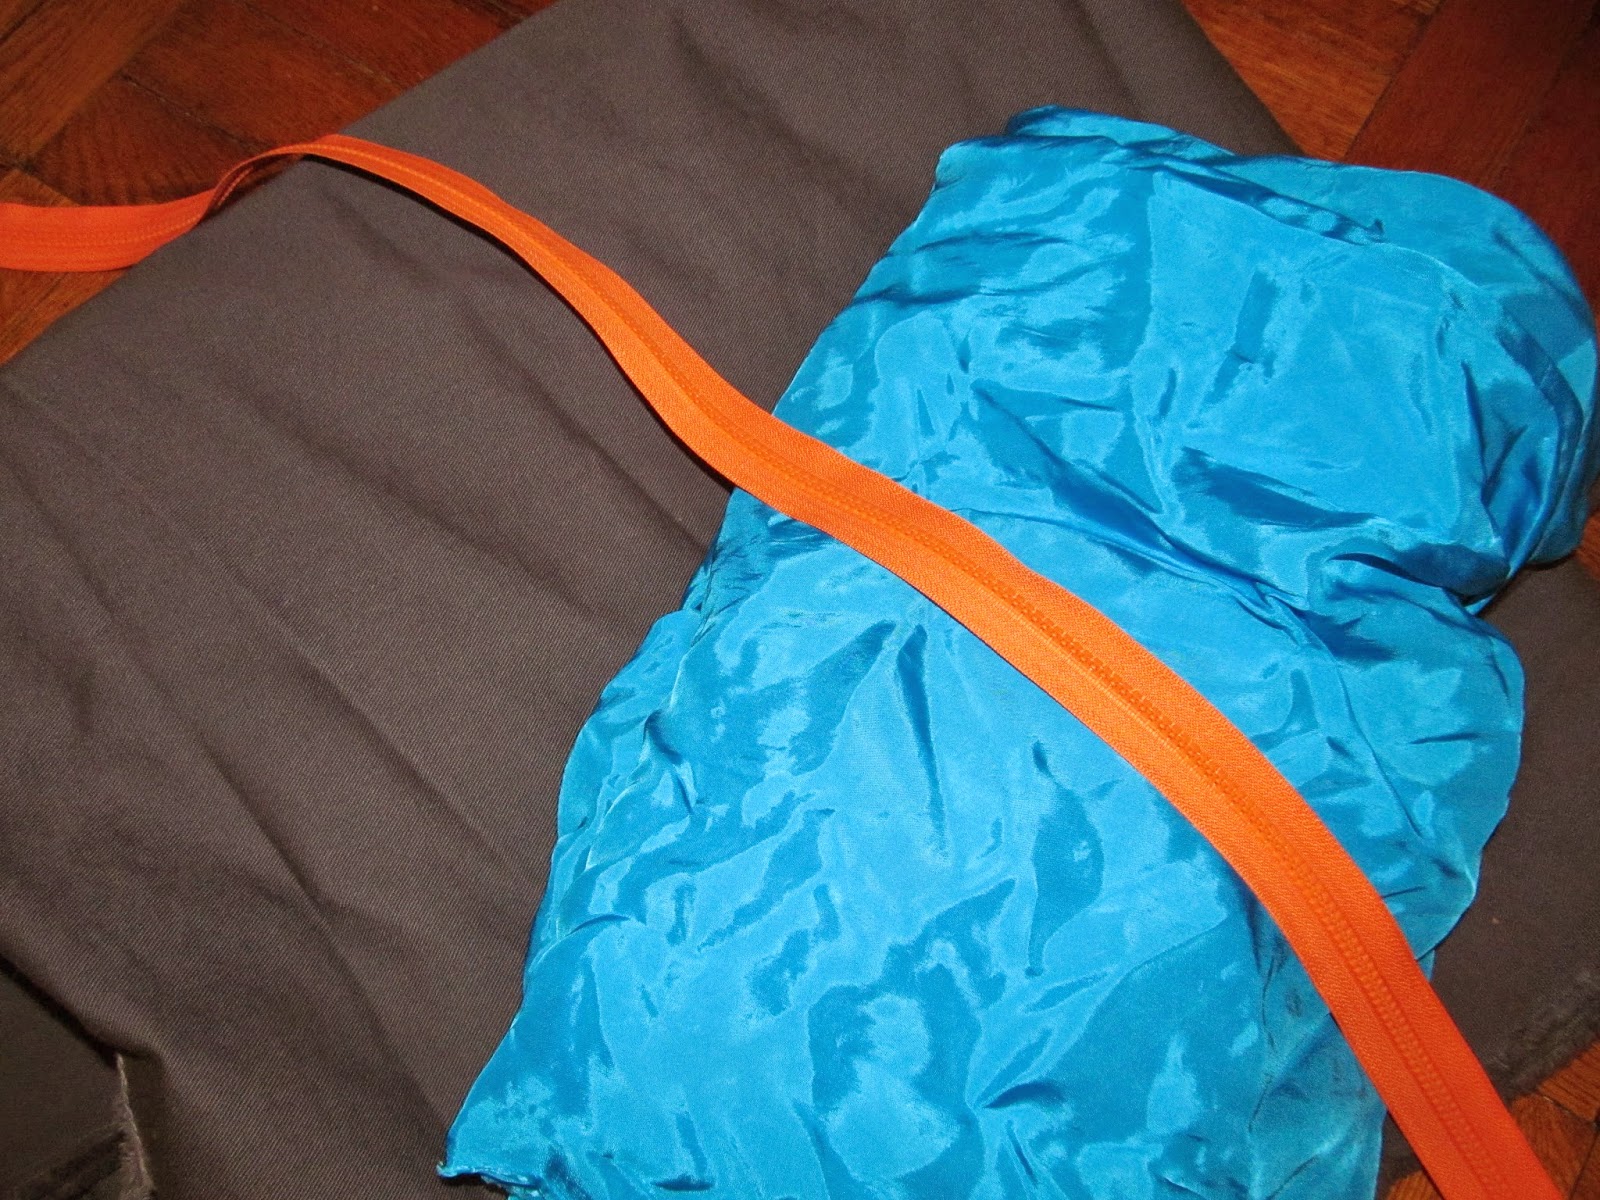
zippers!
Pocketses!!

I decided to go with zippered pockets.  They match the style of the hood/pocket/combo AND they mean that when I fling my coat around (because I'm a graceful lady like that) my things will stay in my pockets.

pocket bags! with bonus toes.
The pocket bags were drafted directly off the main coat pattern - huge side pockets and a little breast pocket - which will mostly store lipbalm, but can fit my phone if it needs too.   (I have an enormous case - re: the general gracefulness that is me.)   


zoomed in pocket detail - complete with snazzy orange top stitching

 The hood is also ready and set to be attached to the whole shebang.   It is lined in thinsulate and quite toasty and comfy to wear round on its own.  I switched it from  two piece hood to what would be  three piece hood if I had a large enough piece of fabric left over after I'd decided the snazzy top stitching would look better in a pair, rather than in  single line down the center.  

poking through its snazzy zippper

Also, after reading upteen thousand blog posts on this jacket, I read a lot of complaints about the interior seams of the hood becoming visible, so I stuck an extra piece of lining onto the interior, which will encapsulate it from all the other seams.


electric blue lining!

Monday, January 5, 2015

Winterizing


My latest project is another winter coat - although this time I'm using a pattern so hopefully I'll be finishing a bit sooner this time around...   It's also a major stash buster - the shell, lining and interlining have all been loitering around the house for years now.    The zippers are new, but all the rest has been waiting for its moment.


I found the pattern to be a good fit with almost no modifications - although I completely ignored the sizing chart and used the finished measurements instead.   According to the instructions I should be in the size 10 and instead I cut out the 4 -  Tasia put in a seriously enormous amount of ease.  I'm also skipping the cuffs and adding  couple inches to the sleeves - I like them to come half way down my hands.

Uncinched - but fitting nicely. 

I'm using thinsulate as the interlining - the weather report is promising chilling temperatures, so I'm turning this into a cozy parka.  It was originally part of my first attempt at making a coat than ended up getting abandoned when the waterproof fabric for the shell ended up being an absolute pain to work with. 

Thinsulate fun times
 Next up - adding the three outside pockets (seriously - how does this pattern not have outer pockets?)


Monday, December 22, 2014

Purple Coat

After years and years and several changes of plans, purple coat is finished, being worn and generally bopping about town.


It is made of a purpley-rainbow bucle wool, purple bemberg lining and lightweight cotton batting as interlining.   (two layers in the hood and torso, one in the sleeves and skirt)  


I've had it nearly finished for a couple of years now - languishing in my closet waiting for me to figure out the closure and the trim.    However, after my regular wool coat started to seriously fall to pieces, I dug through the stash and found a roll of navy piping that worked.  (This also lead to the self-fabric buttons getting switched for big navy ones.  More pop - and made the pipping make sense.)


The pattern is my own design - a massive franken-beast with a fair bit of redrafting.  It has zippered side pockets, zippered sleeves (a relic from when I wore arm braces daily and needed to be able to get in an adjust them without taking off the whole coat.)  (Happily, its been a while and I rarely bother carrying them around anymore.... Actually I'm not even sure where they are right now.   ::heart swells with joy and wonder::   This coat spans years and sagas and stories -- and this one has come out really well. )   (Seriously - we're talking serious glee over here right now.)   


 frolic frolic frolic frolic

 The giant hood sometimes blows off in the breeze and the skirt part flies open, letting my lovely warm air escape - but the torso is warm and the coat is fun to wear, so right now its my feeling-fancy coat, and I love it.


Wednesday, November 26, 2014

in which I make good choices.


I'm probably about five hours from finishing both the sweater and the coat.   I *need* the coat, and yet I keep puttering away at the sweater.


Better pictures in that happy day when sunlight comes again.   Also pictures of all the stuff I've been making, but not blogging, due to lack of convenient garden for photography.   Must work on that....


Thursday, December 19, 2013

winter sewing and a new year's dress

There is something about winter that means I take a lot less pictures.  (Hah... 'something'.  There is no light by the time I get home, its all cold and I want to be a hermit.  I am a happy hermit holed up high above the horizon, hoping for higher heat.)

blech

..and with that... the coat.   Excuse the terrible picture.  I blame winter.   Also a lack of professional photographic equipment.  I feel this could mitigate winter.  but I digress - I find I don't like any of the swatches, so I am forced (forced I say) to go to the fabric store this weekend and play with things.    It's going to be rough.   

Anyhow. Continuing my recent streak on sensible decisions, I've decided this time of travel and work deadlines is when I need to sew a new dress for new year's eve -- and not just any dress -- a fancy franken patterened dress with lace and beading. (I have three kinds of beads) (I make good decisions)  

Specifically these two dresses: Vogue 1174 for the body and 1304 for the straps.
The main dress
The straps


Not being completely insane, I'm skipping all the boning and foundation in 1174 and just doing the shell, relying on the straps to hold everything in place.   I needed to reshape the back a bit, as it lay oddly on my pointy pointy scapula and ditched the cap sleeve, as they almost invariably look terrible on me.


 The first fitting went pretty well - other than the straps, the biggest change is some reshaping around the cups to get everything to sit closer to my chest and prevent any gaping.  (The majority of the wrinkles are due to the fabric being smushed up in a ball for a couple of months before I used it for the muslin... Its not actually way too tight)

Next up:  make new pattern pieces, check them in  a second muslin, and move on to the actual dress!

Tuesday, December 10, 2013

Picking up the coat....

Remember how once upon a time, I was all gung-ho about making a winter coat?  I tested material samples, tried a couple of patterns, interlined, added zippered pockets and fancy sleeves?   And then remember how I got completely overwhelmed and decided I needed a quick break that turned into almost a year?

Well -- picked it back up a couple of weeks ago, and it turns out there isn't all that much left to be done.   I've basted in the lining and am now deciding how I'm going to actually finish this beast of a coat.   The original plan was to use self-fabric binding on all the edges and self fabric buttons as my closures -- however, as cute as that can be, I was starting to think it will be a bit dull.   Then, at dinner the other night, my friend showed up with a green wool coat with leather trim and the kind of covered zipper I'd been toying around with, and I was most intrigued.  (also, ignore the derp face.   I apparently couldn't look normal today.)

buckle
self fabric buttons
contrast

So...here are the options.   The original plan - the new one, with a contrast trim and hidden zipper, and a the final one with some kind of buckle thing instead of the zipper (which I'd been leaning towards all day, but am now thinking I like the hidden zipper)

I've ordered a variety of swatches for the contrast- and I'm going to see how well they work with the coat.

(Perfection fused leather in gunmetal grey, Sierra faux leather in grey, Bijoux faux leather in textured black, and Perfection fused leather in bronze, all from fabric.com) (no sponsorship, just a decent selection)

Anyhow, thoughts, suggestions or really whatever that is even tangentially related to how I ought to go about finishing this thing up while its still winter (tentative goal: wear it for New Year's Eve) would be most appreciated.   

Thursday, January 3, 2013

Winter Coat (really, this time!)


Third time is the charm and whatnot.....  

So, yeah, I really didn't like working with the rubberized codura.   it stuck to everything (I think a Teflon foot would have helped, but I need more space from that particular project)   Anyhow - I still really wanted a winter coat with arm zips so I could fuss with braces and gloves and I had several yards of mystery woven* (burn tests indicate wool) and a few days after visiting family blissfully free of anything at all.   I decided to ditch the bi-swing back, pit zips and thinsulate for the moment as it was just getting to be a bit much.   I still wanted free movement for my arms, so I went with a back gusset instead.    

This coat is actually the ultimate frankenpattern.  (refer to the chart below)   I used the coat block I'd created out of the Tracy Reece (V1086) dress pattern (lace shirt to brocade jacket to tentacle sleeve jacket) the sleeves from Badgley Mishka (V1040) which became all my polar fleece jackets, my own version of the hood Lisa of Small Things came up with, and a couple of other changes for good measure (bust darts, sleeve zips, planned front double welt zipped pockets...)   


Taking the pictures was the first time I'd actually worn it outside -- turns out its quite toasty and warm.  the interlining is cotton flannel which I basted onto all the pieces before putting it together.   The bodice and hood have a double layer for extra warmth. (All the wiggly blue bits are hand-stitching -- days and days that took)


I still need to do the lining, closures, pockets and other bits of fancy I have planned, but I think its coming together really well.   Around here January / February tend to be the coldest, so happy thoughts of it getting done soon.   


*pictures taken mere moments before sunset.   Contrast/exposure/brightness bumped all the way up so things are visible.  The fabric actually reads as a dusky purple in real life - although if you get up close you can see that its really a rainbow.  Looks like it might be a buclé - not totally sure.   

Monday, September 24, 2012

soft and hard shells

 Lets switch things up and start with the hard shell -- a.k.a the tool taco.   Its a little zip up pouch with a foam backing with three interior pockets to hold a selection of tools.

It's a copy of one Kel already had and wanted to duplicate.   His sewing machine was being ...difficult and mine already had lovely peacock thread, so I ended up actually putting it together.

our taco and the original


Construction  is super simple - you need two and a half fabric ovals, one of foam and a zipper.  (Binding too -- we used self fabric bias tape)   Fold the half  (really, 2/3) oval down to finish the flat seam.   Then sew it to one of the fabric ovals in thirds (check out the interior stitching lines)   Make a foam sandwich with the two fabric ovals with a creamy foam center.   sew around the outside edge.   Attach the zipper such that one half is on either side of the oval and then pop on the bias tape to finish it off cleanly.  cutting included, its about a 30 minute project.


As for my shell - its slowly but surely coming together -- all the seam allowances are still huge and all over the place, so it poufs and wrinkles... but its getting there.

They don't show up well, but I'm particularly proud of how the swoop pockets came together.  I've got pictures of the process that I'll post later this week in case anyone else wants to try.


This is the view from my perspective -- snazzy zippered pockets so that all my bits stay inside my coat, no matter where I toss it.


The sides of the zipper are offset so that when closed the pocket lays flat against my body, which I like aesthetically and practically, to prevent excess rain from pooling up inside.


Tuesday, September 18, 2012

a bit of progress on the shell

Well, I'm about a quarter of the way through the shell.   It may look like more, but at the moment everything is only basted in place.   I'm trying to couture-ify this coat (purely for my own amusement) and marked the seam lines rather than the seam allowances - which are all over the place.   Due to the slippy nature of the plasticy ultrex coating, I was worried pins wouldn't hold it in place on the sewing machine, and took Susan Khalje's advice and basted away.

The tricky part - i.e the zippers - pit, pocket and arm -- is still to come.  Also the stealth pockets I intend to hide beneath storm flaps.  Think happy thoughts.


Its a bit hard to see -- but the red lines are the seam lines and the blue/black lines are the wonky seam allowances 

Because of the waterproof nature of the fabric, I didn't use pins -- just pattern weights -- and could trace directly onto the fabric with markers  (I found dry erase worked best, oddly enough)


This was the final muslin, which has long since been taken apart and used for pattern pieces - but it shows where I'm headed with the shell.

I'm going to be documenting this process more than usual, so get ready for pocket-induced insanity.

Monday, September 3, 2012

winter coat : final muslin

Here we have the (almost ) final plan for my coat.    As I was looking at the pictures I remembered I need to add facings to the zippers, inside and out (important for determining fabric yardage) but you get the general idea.

It is a princess seam coat with center front zip, swoop pockets (anyone know the real name?) pit zips, arm zips, bi-swing back, hood, and when I do the final, a zillion little hidden pockets.

Sorry about the white-on-white.   The final will be a dark navy with electric blue lining which will photograph better.  Plus, I'll be able to go outside even if it is as rainy and gross as it is today.

This is just vanity - but it doesn't really pull as much as the lines and wrinkles suggest.  That is an artifact of having my hands in my pockets rather than letting the coat hang straight.  However, its pretty hot and I don't want to hop into this get-up again, so you'll have to trust me.


I've been enjoying going through my gear and figuring out what features I wanted to include.   Pit-zips allow you to vent heat without having to open up the whole coat, which can be quite handy on absurdly windy, wet or cold days.


I added the sleeve zippers to give me space to get my braces on and deal with all the layers without everything getting caught.    For once I will be able to put on a pair of gloves *after* I put on my coat.   This is huge.


 This is a terrible picture of a bi-swing back - but bear with me for a moment.    Have you ever seen a motorcycle jacket that has a gusset behind the shoulder blade, allowing freedom of movement without adding a lot of bulk to the sleek lines?  Well, that is call a bi-swing back (that took a fair bit of research to dig up)   There are a couple of ways to do them.   David Coffin presents one in his book on shirtmaking (pg. 152)  but I ended up going with one I found described (no pictures) on various sewing  and motorcycle jacket forums.   It is composed of two crescents which are attached to each other along the convex side and to the sleeve and jacket back along the concave sides.   To prevent the fabric from poufing out of the armscye permanently, the gusset is attached to the back (or to the opposing gusset) with elastic.   This way one can stretch without popping seams.


Related Posts Plugin for WordPress, Blogger...